Connecting Devices
Keywords:
devices,
IOSensor,
Author(s): Johannes Behr
Date: 2006-02-22
Summary: This tutorial shows you how to connect a device to the framework and how to find all in/out slots of the device interactively. This is necessary if you would like to write a application which automatically connects a device using e.g. a IOSensor (See Input-Output stream tutorial). It only shows how to start a IO-Node and how to find the coresponding input/output slots. You still need to connect the streams to the application (e.g. using a IOSensor) and some code to process the input data (e.g. SteeringNavigator); The tutorial uses a simple joystick but the steps are in general the same for every device
Introduction
The framework does not classify a specific interface for a device-type but dynamically creates input/output slots for every device instance. This has the advantage that we can connect any kind of device providing any kind of data channels. But the design has also one major drawback: You always have to test a specific physical device to see what kind of in/out slots it provides. There is for e.g. only a single "Joystick"-Type which supports any number of buttons and axis. Therefore the same code can be used to connect a 12-Button/6-axis joypad or an 5-Button/0-axis apple-remote (which is also registered as joystick in OSX).
You can connect the in/out slots interactively which gives you the most flexibility e.g. using the Web-Interface. However, if you really know what you are doing and would like to write a application which uses for e.g. an IOSensor to start and connect a specific device you have to know what kind of slots are there. This first part of the tutorial shows you to find those slots. The second part shows how to use this information with an IOSensor.
Finding your slots
This section describes how to find all the in/out slots of a device in three easy steps1. Connect your device to the local machine
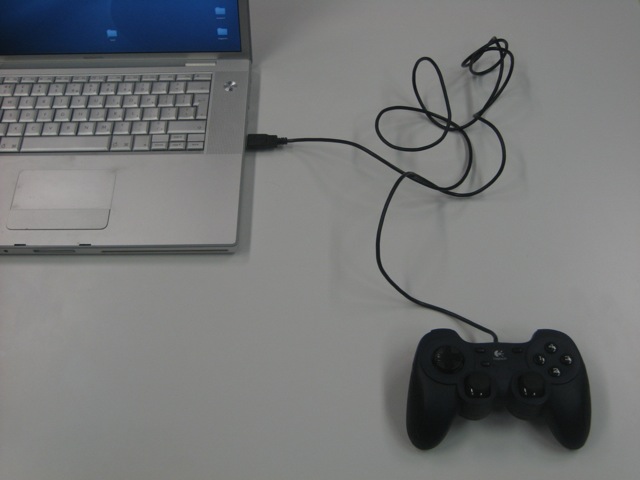
Connect the device to the same machine where you would like to run the InstantPlayer system (You can use devices remotely easily using the InstantIO-Server but this is not the topic of this tutorial). Here I connect a logitech joypad to my notebook.
2. Start the correct Device-handler
Start the InstantPlayer and open the Web-Interface of the Device-Managment system by clicking on "Help->Web Interface Device Managment" in the menu bar entry. This opens your preferred web-browser showing the Web Interface of the device managment system called InstantIO.
This page may look like a static page but this is actual the dynamic User-Interface for the device managment system. The Web interface allows you to control the system remotely which is very handy for Immersive or mobile-AR applications.
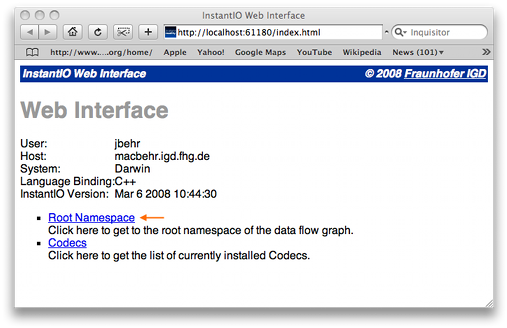
Go to RootNamespace to open the root Namespace page.

Click further on Nodes to open the page to add and remove device handler to the current namespace.
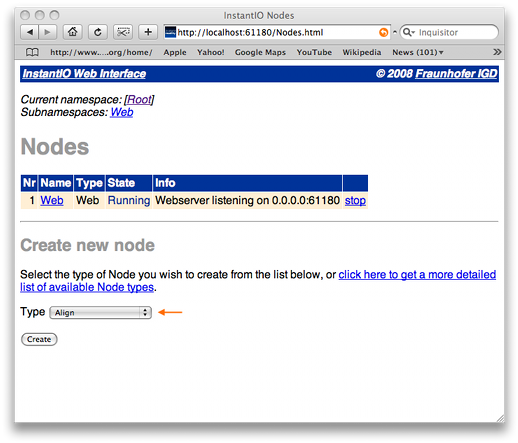
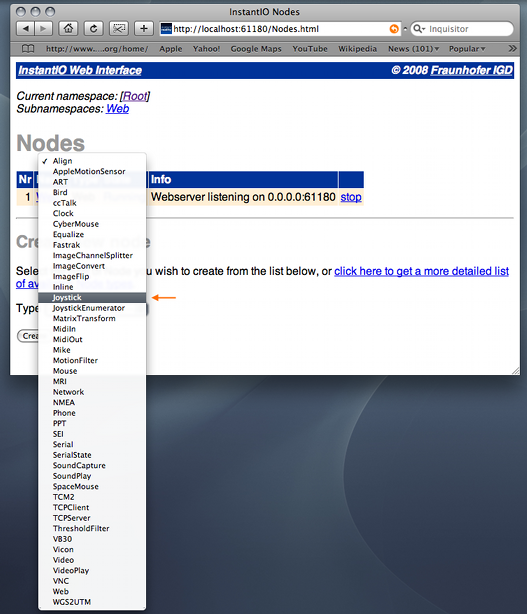
In the lower side of the page you find the "Create new node" section which allows you to create a new device handler. Select the correct type for the connected device. In our case we select "Joystick" and push the "Create" Button.
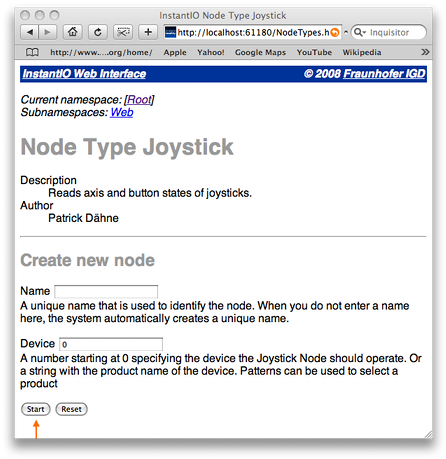
The following page allows you to set some parameter for the device. In our case it is the name and the device identifier. More information can be found on the specific page
This should start the device handler and bring you back to the list of active devices.
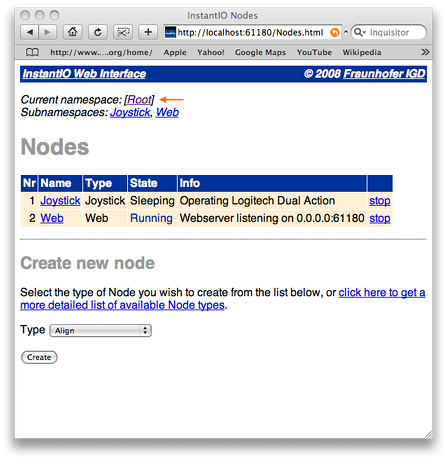
There is now a "Operating Logitech Dual Action" which is sleeping since now Sensor is connected. Click on the Root link at the top of the page to get back to the namespace page.
3. Get a list of all out-slot
Now since we have a active device handler for the joystick we can see what kind of dynamic slots are available.
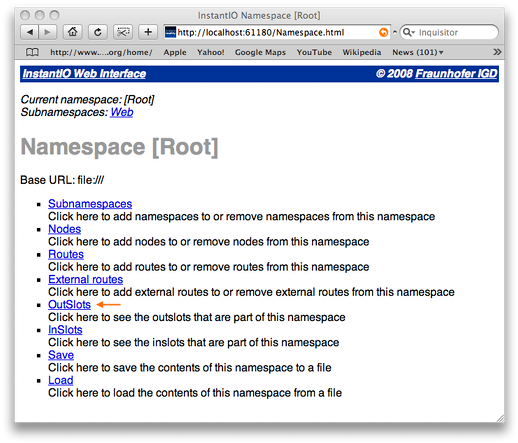
No click on OutSlots to get a list of all available OutSlots for the new device
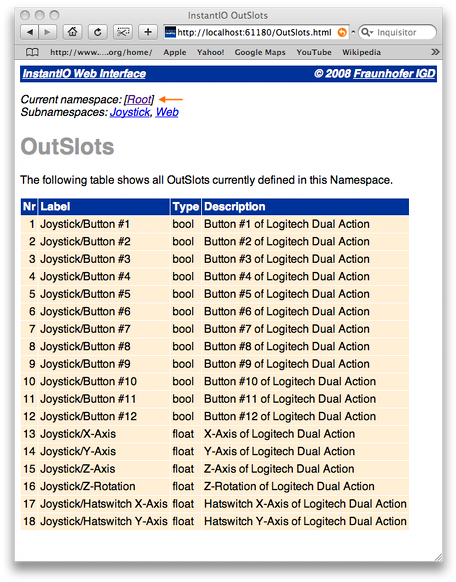
This list shows 12 Buttons and 6 Axis which the joystick provides. These are all slots of the physical device.
Use the information to start an IOSensor
The IOSensor allows you to start a InstantIO type directly from you Scene. Use dynamic outputOnly slots, the same way you use them in Script nodes, to connect the slots. The Name of the slots have to be the same as in the above list. There is one aspect you have to mind. The InstantIO slots sometimes contain spaces and you have to replace those with wildcards (* and ?) to cat a single token.
Code: IOSensor classic encoding
	DEF myStick IOSensor {
		type "joystick"
		outputOnly SFFloat *Hat*x*axis*
		outputOnly SFFloat *Hat*y*axis*
	}
If you use the xml encoding you can use the full name including any kind of spaces:
Code: IOSensor xml encoding
   <IOSensor DEF='myStick' type='joystick'>
      <field accessType='outputOnly' name='Hatswitch X-Axis' type='SFFloat'/>
      <field accessType='outputOnly' name='Hatswitch Y-Axis' type='SFFloat'/>
    </IOSensor>
You can connect those slots to any kind of other node (e.g Navigator or Script) to process the incoming values. Look at the next tutorials in this section to get further information. Look at the Input-Output stream tutorial to get further information about the IOSensor.
Conclusion
This tutorial shows how to connect external devices and how to find their provided slots. This is the information you need to connect the service to the framework. You can do it interatively or as part of your scene useing an IOSensor or similiar services.
Comments
This tutorial has no comments.
Add a new comment
Due to excessive spamming we have disabled the comment functionality for tutorials. Please use our forum to post any questions.