Installation on Mac OS X
Keywords:
installation,
uninstallation,
mac
Author(s): Patrick Dähne
Date: 2008-07-29
Summary: This document describes how to install Instant Player on Mac OS X.
Installation on Mac OS X
This document describes all steps necessary to install Instant Player on your Mac, starting with the download, the actual installation, and how to start Instant Player for the first time. It also explains how to deinstall Instant Player completely in case you do not want to use it anymore.
Quick Summary for the Impatient
- Download the Instant Player disk image from the Instant Reality web site
- Mount the disk image
- Drag the Instant Player application icon into your "Applications" folder
- Start Instant Player by double-clicking the application icon
- To uninstall Instant Player, drag the application icon into the waste bin
System Requirements
Instant Player has the following minimum system requirements:
- PowerPC G4, G5 or Intel processor
- Mac OS X 10.4 Tiger or newer
- 512MB of RAM
- 250MB of available hard-disk space
Of course you'll also need a powerfull graphics board. We recommend NVIDIA and ATI boards. Intel shared memory boards work, but their performance is not optimal for large 3D scenes.
Download
When you didn't already get the Instant Player disk image from another source, you first have to download it from the Instant Reality website. Go to the following address: http://www.instantreality.org/downloads/
The size of the download is round about 70MB. It is a universal binary, i.e. the executable runs natively on both PowerPC and Intel Macs.
When the download finishes successfully, you should have a disk image containing Instant Player on your hard disk. The actual location depends on your browser - usually it is on your desktop, or in your Downloads folder.
Mounting the disk image
When using Safari, the disk image usually gets mounted automatically. When this does not happen, or when you're using another browser, you have to mount the disk image manually. Simply double-click the disk image icon. Alternatively, right-click the icon and select "Open" from the context menu.
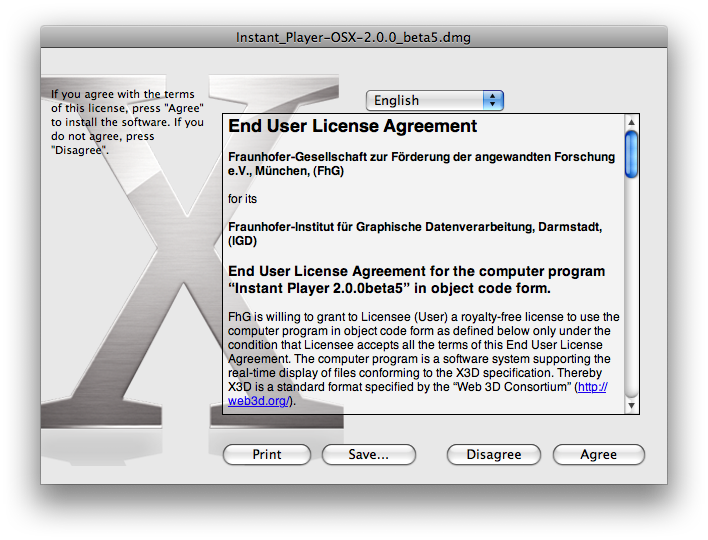
Before mounting the image, the Finder will show you the Instant Player End User License. Please read this license carefully. When you accept the conditions of the license, click on the "Agree" button to continue the installation. Otherwise, click on the "Disagree" to stop the installation. You can also print the license or save it to a file. But this is usually not necessary - you can get the license anytime when running Instant Player later on.
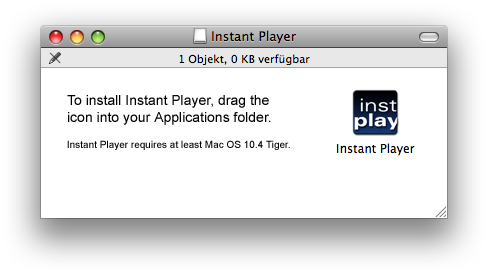
After mounting the disk image, a Finder window should automatically open that shows the contents of the disk image. When this does not happen, you can manually open this window by double-clicking the mounted disk image icon on your desktop. Alternatively, you can right-click this icon and select "Open" from the context menu.

Installing Instant Player
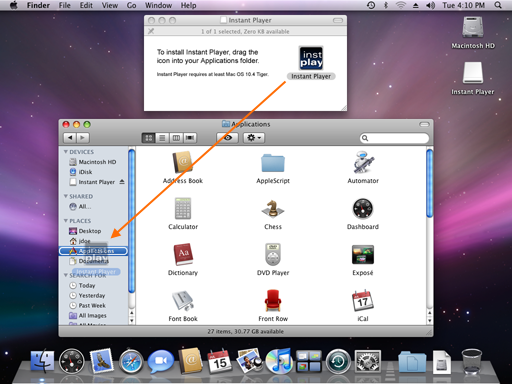
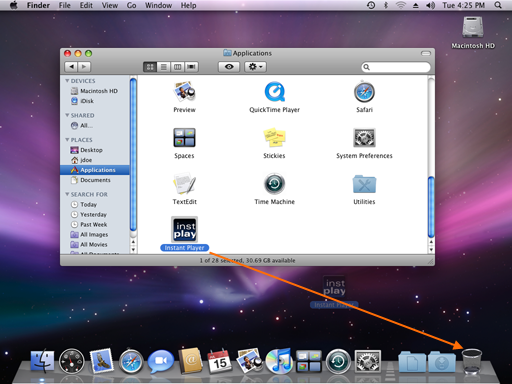
To install Instant Player, you simply drag its icon from the disk image to a place on your hard disk. Usually you'll install Instant Player to your "Applications" folder. To do this, you'll need administrator rights. But it is perfectly okay to install Instant Player to any other place onto your hard disk.
Cleaning up
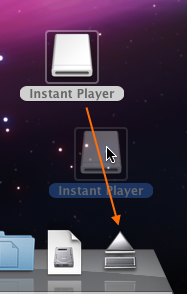
When you successfully installed Instant Player on your hard disk, it's time for cleaning up. First, unmount the disk image by dragging the icon to the trash bin in the dock:
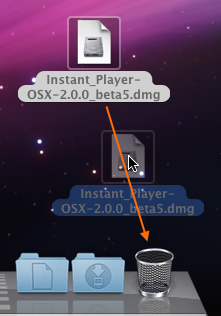
Then, when you do not need the disk image anymore, e.g. for installing Instant Player on another machine, you can also delete the image file:
Starting Instant Player for the first time
To start Instant Player, simply double-click the Instant Player icon. Alternatively, you can right-click onto the icon and select "Open" from the context menu.

Uninstalling Instant Player
Uninstalling is as simple as installing Instant Player. Simply drag the application icon to the trash bin in the dock.
Dragging the icon to the waste bin deletes the Instant Player executable, but it does not remove the preferences saved for each user. These preferences are saved in two files at the following locations under each user's home directory:
- ~/Library/Preferences/org.InstantReality.InstantPlayer.plist
- ~/Library/Preferences/ByHost/org.InstantReality.InstantPlayer.*.plist
where "~" is the user's home directory, and "*" stands for an arbitrary number of arbitrary characters.
The size of these configuration files is quite small (just a few KBs), so it's usually no problem to leave them on your hard disk.
Comments
This tutorial has no comments.
Add a new comment
Due to excessive spamming we have disabled the comment functionality for tutorials. Please use our forum to post any questions.