Web Interface
Keywords:
web interface,
external interface,
scripting,
debugging
Author(s): Patrick Dähne
Date: 2009-01-12
Summary: The Web Interface is a small web server integrated into the Instant Player. This tutorial demonstrates how to use that server to debug and to modify a running scene.
Introduction
The Web Interface allows to display and modify the scene graph of a 3D scene currently displayed in Instant Player. There is a small web server integrated into Instant Player. By using a normal web browser like Internet Explorer or Firefox, you can connect to that web server. On the one hand, this is extremly useful when developing and debugging X3D applications. On the other hand, it is yet another API you can use to control the scene from external software components.
To be able to follow the examples in the following sections, you should load the following scene in Instant Player:
Code: Test scene (VRML encoding)
#VRML V2.0 utf8

Shape
{
  appearance Appearance
  {
    material DEF mat Material
    {
      diffuseColor 1 0 0
    } # Material
  } # Appearance
  geometry Sphere
  {
  } # Sphere
} # Shape
In XML encoding, the same scene looks like this:
Code: Test scene (XML encoding)
<?xml version="1.0" encoding="UTF-8"?>
<X3D profile='Full' version='3.0'>
<Scene>
<Shape>
<Appearance>
<Material DEF='mat' diffuseColor='1 0 0'/>
</Appearance>
<Sphere/>
</Shape>
</Scene>
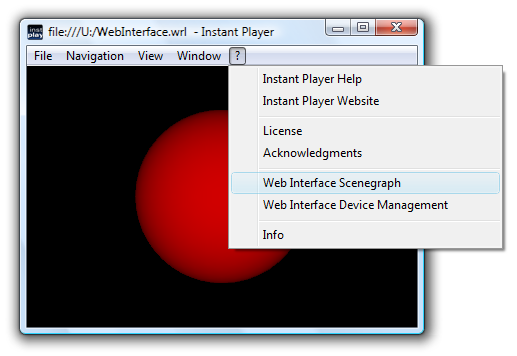
</X3D>The scene simply consists of a red sphere. The Material node that defines the red color gets the name "mat".
Warning: The Web Interface currently only supports one single open 3D scene. I.e. until this bug is fixed, you should make sure that only one VRML/X3D file is opened in Instant Player. Otherwise strange things may happen.
Using the Web Interface for Debugging
Starting the Web Interface for debugging is quite easy: Simply click onto the "Web Interface Scenegraph" item in the help menu.
Doing this will open your favourite web browser with the start page of the web interface. Of course, you can also do that manually: Start the web browser and enter the following line into the address bar:
http://localhost:35668/
You can also do that from any other machine in the network, but in this case you have to enter the correct name of the machine Instant Player is running on. E.g. the name of my machine is "pc1626", so I have to enter the following URL:
http://pc1626:35668/
Warning: There might be a firewall running on your machine that blocks access to the web interface from other machines. If you do not get a connection, check your firewall settings!
In all cases, you'll get to the start screen which looks like this:
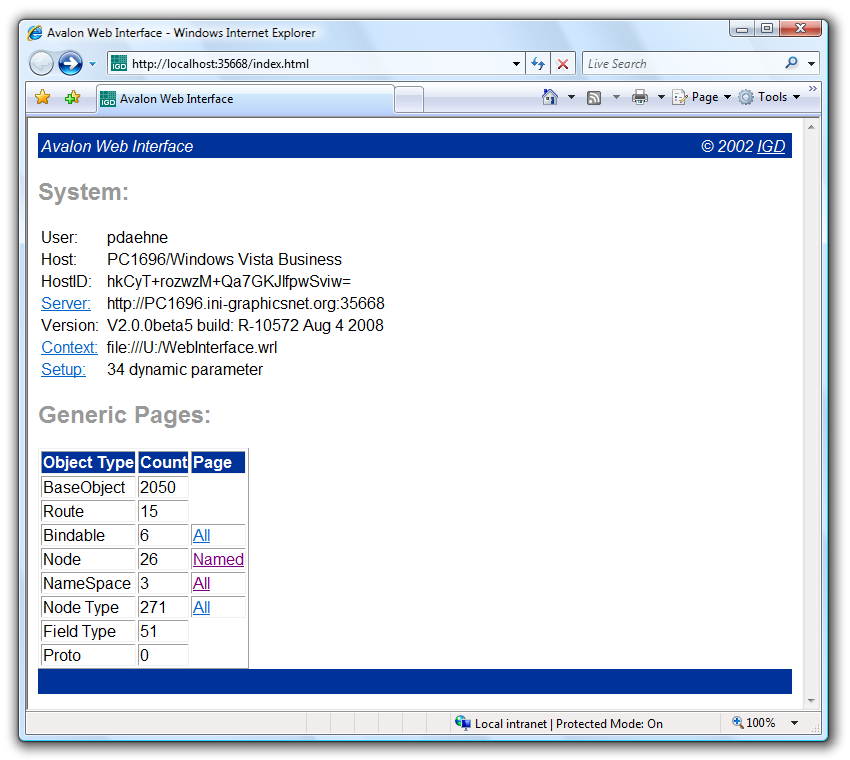
Unfortunately, the Web Interface currently is quite rough and not very polished. That will probably change in the future, but for now you have too live with the quite ugly, outdated appearance and the unintuitive user interface.
So let's find the Material node in our example scene that defines the color of our sphere. On the bottom half of the main page, there is a link called "Named" that leads to a page that contains all named nodes in the scene:
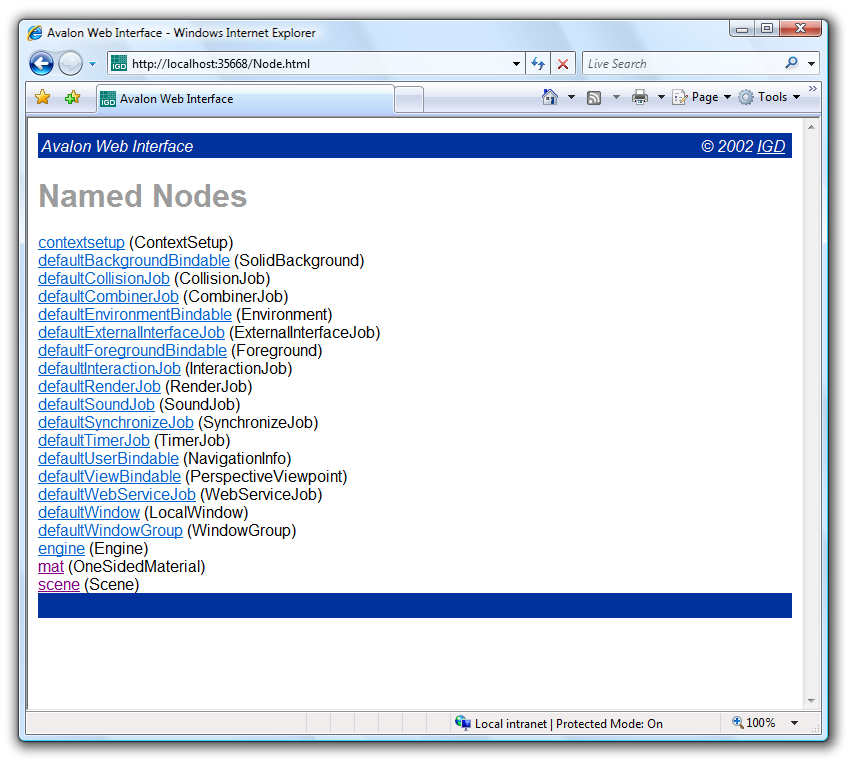
But wait, what's this? We have just one named node in our scene (the Material node called "mat"), but that page shows many more nodes! The answer is simply that Instant Player creates some internal nodes when loading a scene. These nodes also show up in the list. Simply ignore them and click onto "mat" which takes us to another page which shows the fields of our Material node:
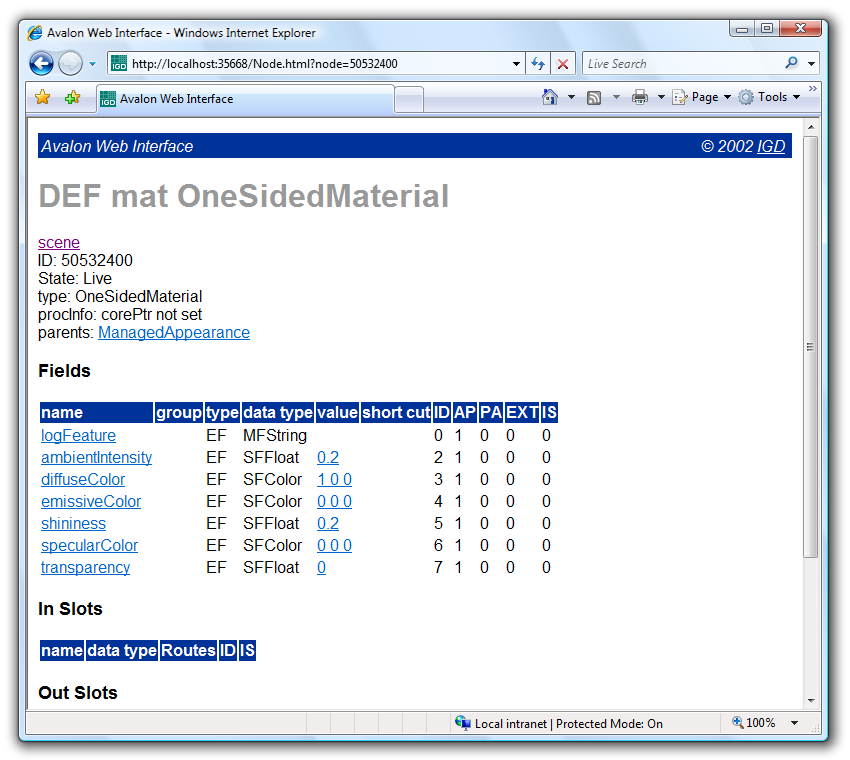
The most interesting information are the current values of fields, in slots and out slot. There is a lot of other information on that page, but most of it is quite obscure and only of interest for the developers of the Instant Reality system. What might puzzle you is that the headline calls our Material node a "OneSidedMaterial" node. The reason for that is that Instant Reality does not stick 100% to the node hierarchy as mandated by the VRML/X3D specification. The VRML Material node automatically gets mapped to an Instant Reality "OneSideMaterial" node when loading a VRML file. Usually you won't realize the difference, but the Web Interface is one of the few places it shows up.
Now let's change the color of our sphere. Click onto the "diffuseColor" field (either the name or its value). This will get you to the following page:
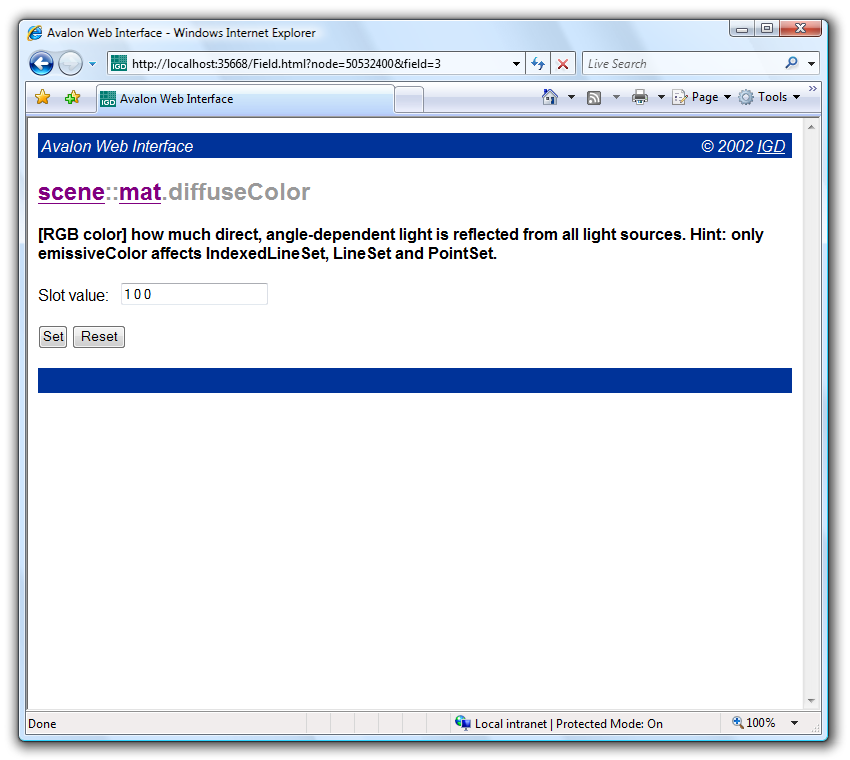
As you can see, there is an edit field that shows the current value of the "diffuseColor" field is "1 0 0", which means "red". Change it to "0 1 0" and click onto the "Set" button - and voilà! Have a look at the Instant Player rendering window - we've got a green sphere.
Of course, it is also possible the traverse the full scene graph and modify nodes that do not have a name - but doing that is a little bit more difficult. Go back to the main page. Remember - last time we've clicked onto the "Named" link to get a list of all named nodes in the scene. This time we'll click onto the "All" link below the "Named" link to get a list of so-called "Namespaces". I won't tell you what namespaces are, as it does not really matter for this tutorial. The important point here is that one of these namespaces is called "scene" and contains the VRML scene graph. Clicking onto the "scene" namespace gets you to a page which shows some information about the namespace and again a list of named nodes. In the center of the page, you'll find a link to the root node. The root node is actually a Group node that contains all root nodes of the VRML scene. Starting from the root node page, you can traverse the whole scene graph (you'll find the children of a node on the bottom of the page).
Using the Web Interface as an API
Besides using the Web Interface when developing or debugging X3D applications, you can also "abuse" the interface as an API that allows to control the 3D scene from any external software component that is able to download data from URLs.
In the section above, we used the Web Interface to change the color of the sphere from red to green. When you pressed the "Set" button, the web page used the following URL to transmit the new color value to the player:
http://localhost:35668/setFieldValue?node=mat&field=diffuseColor&value=0+1+0
You can check that by manually entering that URL into the address bar of your browser. The general format for the URL used to send events into the 3D scene looks like this:
http://{hostname}:35668/setFieldValue?node={nodename}&field={fieldname}&value={value}where {hostname} is the name of the machine the player is running on (or the special name "localhost" when the player is running on the same machine), {nodename} is the name of the node in the scene ("mat" in our example), {fieldname} is the name of the field ("diffuseColor"), and {value} is the new value of the field ("0 1 0"). The value of the field must be written the same way as in VRML/X3D files. URLs cannot contain spaces, instead you have to replace spaces with plus signs ("+"), i.e. you have to write the green color value "0 1 0" like this: "0+1+0".
So what can you do with such kind of API? For example, consider a HTML page that you can display in a web browser and that allows to control the 3D scene. The following HTML code defines two links, "red" and "green", which allow to switch the color of our sphere between red and green:
Code: Simple HTML page to change the color of the sphere
<html>
  <body>
    <a href="http://localhost:35668/setFieldValue?node=mat&field=diffuseColor&value=1+0+0">red</a>
    <a href="http://localhost:35668/setFieldValue?node=mat&field=diffuseColor&value=0+1+0">green</a>
  </body>
</html>
Simply load the example scene with the sphere into Instant Player and open the HTML code above in a web browser on the same machine. Click onto the two links on the HTML page and see how the sphere changes its color accordingly.
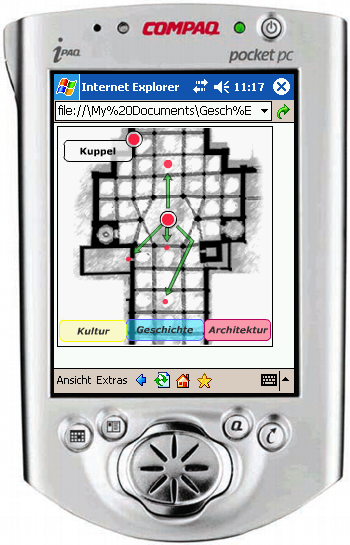
The important point here is that you can create GUIs for 3D scenes without any knowledge about VRML/X3D. You can give the relevant URLs to a web designer and tell him to create a fancy HTML page. This page runs on any device that has a web browser installed, especially PDAs and mobile phones. Of course you're not limited to HTML, instead you can use other technologies like Flash. For example, that's exactly what we did at Fraunhofer IGD when we developed our "Cathedral of Siena" demo. That demo allows to stroll through a virtual model of the Cathedral of Siena. A virtual tour guide called "Luigi" gives additional information about objects of interest.

To interact with the virtual scene, the user gets a small PDA running a Flash applet that displays a ground plan of the church. The user can move in the scene by clicking onto that plan, or he can use the directional pad of the PDA:
But the Web Interface is not limited to Web technologies like HTML and Flash: Many scripting languages like Python and Ruby can download data from URLs, which means that they can use the Web Interface API. On many Unix systems like Linux and Mac OS X, you can also use Shell scripts in combination with command line tools like cURL and Wget. For example, you can enter the following commands on a machine where cURL and Wget are installed to change the color of the sphere:
curl "http://localhost:35668/setFieldValue?node=mat&field=diffuseColor&value=0+1+0"
wget -q -O- "http://localhost:35668/setFieldValue?node=mat&field=diffuseColor&value=1+0+0"
Obviously, the Web Interface has one major drawback: It only supports one-way communication, i.e. the web browser (or other software components) can connect to the 3D scene and modify it, but the scene cannot tell the web browser when some event in the scene happened. For such kinds of bi-directional communication you have to use other APIs, especially the External Authoring Interface (EAI). Nevertheless, the Web Interface is sufficient for many applications, e.g. simple walk-through scenarios like the "Cathedral of Siena".
Example Files
The test scene is available in classic VRML encoding ("WebInterface.wrl") as well as XML encoding ("WebInterface.x3d"). You'll find the HTML source code in "WebInterface.html".
Files:
Comments
This tutorial has no comments.
Add a new comment
Due to excessive spamming we have disabled the comment functionality for tutorials. Please use our forum to post any questions.