Accessing hardware in InstantIO via REST from X3DOM
Keywords:
REST,
InstantIO,
X3DOM
Author(s): Tobias Alexander Franke
Date: 2013-08-09
Summary: InstantIO is equipped with a REST API, which enables access to hardware via HTTP or Websockets, exposing all features of InstantIO to web-based 3D applications. This tutorial will show you how to use it.
Warning: The REST interface of InstantIO is currently in a pre-alpha state. We have enabled an early access preview, but it will certainly crash at some point. A stable version should be available with the next major release of InstantReality.
InstantIO and REST
InstantIO is a library and server application used in the InstantReality framework to enable broad access to hardware. To do this, each piece of hardware is instantiated as a node in a graph, and each node has In- and OutSlots which either gather or produce data. For instance, a Joystick only produces data and has OutSlots for the buttons being pressed or the axis the stick is currently being pushed on. Additionally, nodes have fields which contain static variables initialized right at instantiation. These might include a node name, a specific setting for the hardware etc.
The REST interface built on top of InstantIO exposes all of these slots and fields to the outside. With just the right REST address, you can access this information or manipulate it with HTTP commands or websockets. A key benefit of this interface is that web applications such as X3DOM apps can access and use hardware in a browser by running the InstantIO server application without any plugins or the need to enable special browser support.
Creating a device
In the next few steps, we will instantiate a piece of hardware, similar to the tutorial on Connecting Devices. First find your InstantIO application and run it. In your taskbar you will find a little icon indicating a running InstantIO service. With a right-click on it, select Webinterface, which will bring up a browser window.
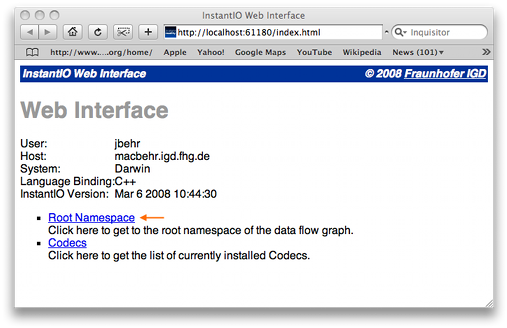
Click on Root Namespace to get to the top level namespace which contains instantiated hardware nodes.
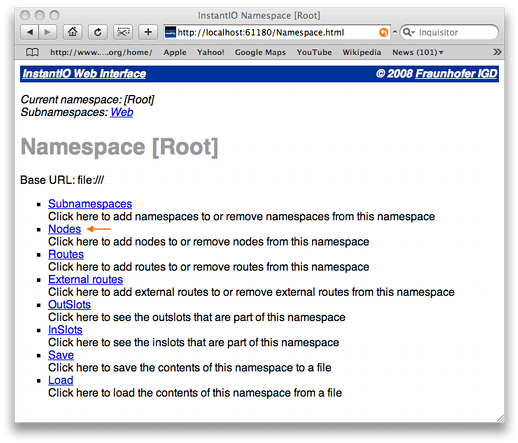
In this namespace, we can instantiate a node by clicking on Nodes in the current view.
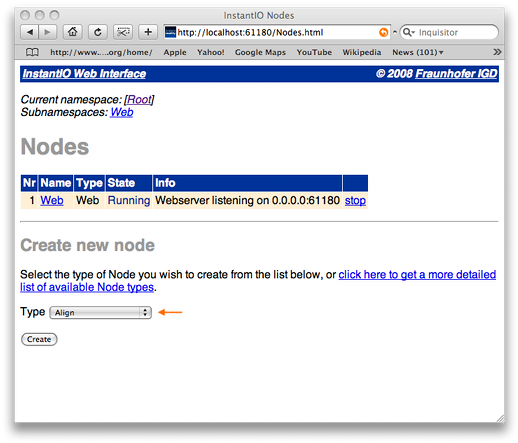
This view presents currently instantiated hardware. If you have never opened up InstantIO before, you should see only one node: the Web server. In the lower half you can select a device or library from a dropdown menu called Type. Not all devices are listed here though: plugins, which depend on the availability of a certain SDK or driver, are instantiated dynamically with their name. If you want to use these devices, simply enter the plugin name in the text field Type. These are:
- Oculus Rift: OculusRift
- OpenNI: NI
- Microsoft Kinect: Kinect
- LEAP Motion: Leap
When you are done, click on Create to continue. If the plugin is able to initialize (on the software side of things) or the device you have selected from the dropdown menu, you will be prompted with a new dialog. Depending on the device, this dialog will contain different fields which you can set or leave at their default values.
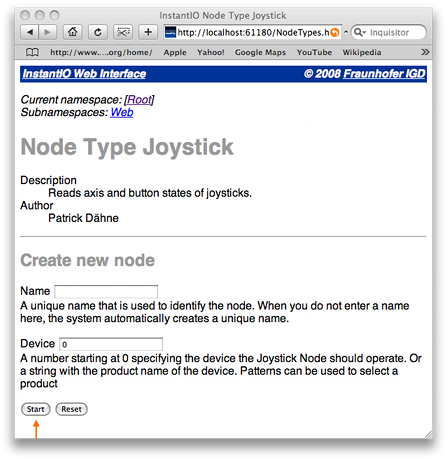
In most cases it is sufficient to simply give your node a unique name and click the Start button. This will create a new node and initialize the device. If this process was successful, you should see a new node appear in the list of devices. InstantIO will remember this device and it should be right where you left it after a restart of the server application.

You should now have a new device ready to use. We will now take a look how to access its properties with the REST interface.
The REST interface
A REST address to an InstantIO node is mainly identified by the node's name, e.g. foo: http://localhost:12345/InstantIO/element/foo. You can try this with the web node which is instantiated by default. Simply open a browser and enter the address. It will bring up a JSON container which provides information on the node. For instance, the web node may look like this:
Code: An example JSON container of a Web node
{
  "id": "Web",
  "type": "Web",
  "length": 1,
  "cardinality": "single",
  "attributes": [
    "Address", "Port", "UserId", "Password", "LogSize"
  ],
  "relations": [ "routes" ],
  "input": [ ],
  "output": [ ]
}
These entries reflect basic properties of a web node. The entry attributes presents a list of all Attributes an Element (in this case the web node) might have. In the context of InstantIO, these Attributes are all fields, InSlots and OutSlots of a Web node. To access one of them, simply add them to the address. For instance, to access the attribute Port, you go to: http://localhost:12345/InstantIO/element/web/Port. You will be presented with another JSON container, this time describing and Attribute.
Code: An example JSON container of an Attribute
{
  "name": "Port",
  "type": "string",
  "length": 1,
  "cardinality": "single",
  "input": [ "string" ],
  "output": [ "string" ]
}
Here you can see some important information about the Attribute: it has a type string and a length 1, which basically means it's a single string. You can read or write to it by supplying a string or reading it as a string. The lists input and output however may contain additional types, such as int, float or double2 (a 2-vector of doubles). By using the input or output type as additioal mimetype in the HTTP query, you can access the value, in this case the value of Port, in a given format: http://localhost:12345/InstantIO/element/web/Port.string.
Connecting web-apps
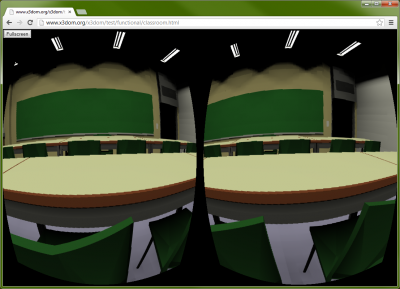
There are two ways of accessing a field or Slot of an InstantIO node: via HTTP with a pull-mechanism, or with WebSockets in a push-like manner. The WebSocket variant is the preferred way of reading data in an interactive Javascript application. In the following example, we connect a WebSocket on an OutSlot of an instantiated Oculus Rift node (named ovr) to a X3DOM viewpoint. WebSockets use the same address as the REST API, but with a different protocol identifier ws://.
Code:
function websocket(location)
{
    if (window.MozWebSocket)
        return new MozWebSocket(location);
    else
        return new WebSocket(location);
}

function start_log(location)
{
    var viewpoint = document.getElementById('vpp');

    socket = websocket(location);
    socket.onmessage = function(event)
    {
        //console.log(event.data);
        var h = x3dom.fields.SFVec4f.parse(event.data);
        var q = new x3dom.fields.Quaternion(h.x, h.y, h.z, h.w);

        var aa = q.toAxisAngle();
        //console.log(aa[0].x + " " + aa[0].y + " " + aa[0].z + " " + aa[1]);

        viewpoint.setAttribute("orientation", aa[0].x + " " + aa[0].y + " " + aa[0].z + " " + aa[1]);
    }
}

var instantIOport = "12345";    // attention: use port as opened in InstantIO
start_log("ws://localhost:" + instantIOport + "/InstantIO/element/ovr/Orientation/data.string");
The function websocket(location) is a helper to abstract away differences in the Javascript API for websockets of different browser vendors. In the start_log(location) function, we first search for a X3DOM viewpoint element called vpp and then open a new websocket on the location ws://localhost:12345/InstantIO/element/ovr/Orientation/data.string. A callback function onmessage will be executed when ever the websocket is provided with new data from the node's OutSlot Orientation, which in this case is the head tracker orientation of the Oculus Rift HMD. Since the data is queried as string, we parse the event.data and create a new Quaternion out of the four numbers in the Orientation, turn them into an axis angle representation and use these values to set a new orientation in the viewpoint X3DOM node.
The only real setup you need to take care of is instantiating a device, making sure that the name of the instantiated node matches the name supplied in your REST address in the Javascript code and having the right port to the InstantIO server it is currently running on.
If you have an Oculus, go ahead and download the current InstantReality release. After starting InstantIO, instantiate an OculusRift node and call it ovr, instantiate a Web node and set the port to 12345 (this way the web interface can be reached on a fixed port in addition to the random port chosen when InstantIO starts) and then try out the X3DOM demo from here. Alternatively, you can download the HTML file and set the Javascript variable instantIOPort to another port number of your choice.
Comments
This tutorial has no comments.
Add a new comment
Due to excessive spamming we have disabled the comment functionality for tutorials. Please use our forum to post any questions.